Cover: INJ Culbard
Publisher: Rebellion
Judge Dredd
Script: Rob Williams
Art: Henry Flint
Letters: Annie Parkhouse
The tired, poor, huddled masses aboard the barge yearn to make landfall. As the barge approaches Mega City 1, Judge Tan is chased to the bridge, where he must figure out how to stop the ship’s steady journey.
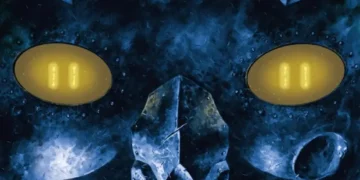
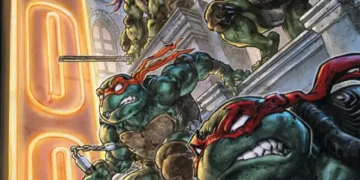
Dredd brawls with Carver, but how do you fight a man-shaped bundle of worms? Carver’s face reaches out with worms and overwhelms Dredd with visions. The following page is phenomenal: a grid of twenty panels wherein two Native Americans observe a European ship dropping off pilgrims. Spattered throughout are these incomprehensible, bloody panels, depicting something more akin to a texture rather than a particular object. As the page progresses, the pilgrims approach, and the natives see Dredd aboard, his face filled with worms. The uniform panels give the sequence an uncanny feeling in a medium so used to variety in panel size and shape, so it effectively sells the feeling that Carver is inflicting on Dredd.
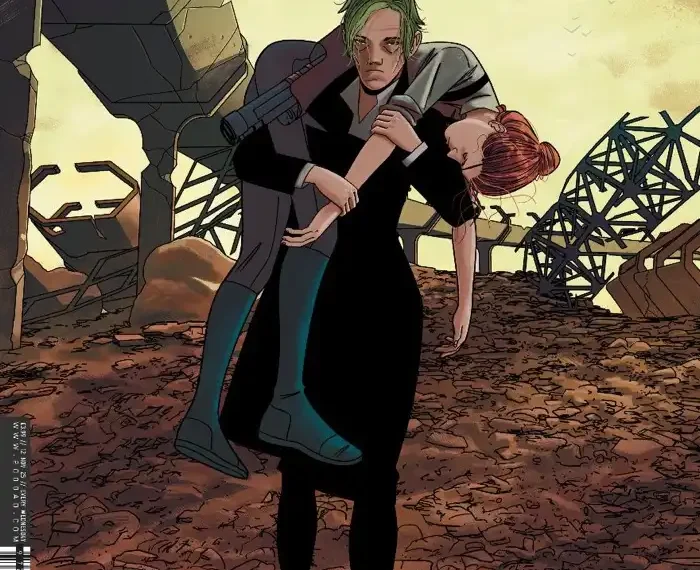
Anderson rescues Dredd at the last second, but is it too late?
Henry Flint’s art is so consistently great that it’s easy to take for granted, but when it’s of this high quality, I have to commend him for his mastery.
Red Dragon
Script: Rob Williams
Art: Steve Yeowell & Patrick Goddard
Colours: Dylan Teague
Letters: Simon Bowland
At the end of the last chapter, CIA agent Jayne introduced herself to Siadwell. At the beginning of this one, we find them in bed together. Clearly, her intentions are not romantic because as soon as they finish humping, she grills him about his life as a superhero.
The flashback sequence in this episode has remarkably subdued colours. The superhero life has lost its shine for Siadwell, and the colours have begun to fade away.
Officer David Williams takes Martin and Dee to look for Morgan. Martin sits behind the driver, but he can’t get comfy when he sees a tape in the passenger side footwell. Martin remembers what the old man up the mountain says and realises that they’re in danger. How he attempts to fix this, I won’t reveal, but let’s just say my theories haven’t been totally off the mark.
Williams’ choice to completely omit what happened in the car with Tanya and Morgan is bold. He used a similar technique with Martin’s conversation with the mountain man so that both blind spots could be resolved at a later point, and it shows deserved self-confidence. This episode begins to resolve what happened on both occasions.
The tension is ramping up, and we’re approaching the truth of Siadwell’s split from Cloud 9 from both directions in time.
Void Runners
Script: David Hine
Art: Boo Cook
Letters: Annie Parkhouse
After the uprising, the Manjukaks have taken over and forced the federation to sign a peace treaty.
Alice Shikari is troubled by the fallout from her arrival and receives a vision from the Great Pleroma: an infant pleroma has been murdered. Alice resolves to go back to the federation and save the rest.
Boo Cook’s art remains terrific, and the depiction of the visions has a dreamlike quality.
Brass Sun
Script: Ian Edginton
Art: INJ Culbard
Letters: Simon Bowland
This part starts in Media Res, with Ariel telling Wren what happened: right as the blast approached them, Wren summoned a wall of stone to protect them. The mother of the family sees the act of magic and knocks Wren out with a rock.
Edginton is a master of episodic storytelling, giving you bang for your buck every single week. The last page is a seriously cool elaboration on a location we saw in the previous prog, so it all stitches together in a satisfying and curiosity-piquing way. I have no idea what the consequences of that last page are, but I am keen to find out.
Rogue Trooper
Script: Alex De Campi
Art: Neil Edwards
Colours: Matt Soffe
Letters: Jim Campbell
Helm fights the virus in the infected computer. The virus is visualised as these flying centipedes, which burrow into him and take him over. Just as a Nort insignia appears on his head, reinforcements arrive. Bagman distracts the virus and stabs it.
Both infantrymen eject the machine, and they set off for the bottom of the Scum Sea.
It’s such a fun idea for a battle. I wonder if there will be any fallout from this, where Rogue won’t be able to use Helm or Bagman at a critical point. Regardless, the squad heads for FOB Azure, where I’m sure things won’t be what we expect.
Overall: 8/10

Tony Holdsworth is a comics writer based in Dundee, Scotland, who reviews 2000AD each week.
His comics can be found here: https://tonyholdsworth2.wordpress.com/category/portfolio/